Setting up your RV should feel exciting, not stressful. Whether you are pulling into a site for a weekend getaway, an extended stay, or a long-term visit, a smooth setup helps you start your trip on the right foot. But even experienced RV owners can make simple mistakes that lead to frustration, damage, leaks, or unnecessary headaches.
At Summer Breeze USA RV Resort, we welcome RV travelers of all experience levels. Some guests have been RVing for years, while others are still learning the basics. No matter where you are on that journey, a proper setup routine can make your stay safer, easier, and more enjoyable.
The good news is that most RV setup mistakes are easy to avoid once you know what to look for. From leveling your rig correctly to using a surge protector, sewer hose support, water pressure regulator, and checking your clearance, a little preparation goes a long way.
Here are some of the most common RV setup mistakes and how to avoid them.
1. Not Leveling Your RV Properly
One of the first things you should do after parking your RV is make sure it is level. This might seem like a minor comfort issue, but it is more important than many new RVers realize.
An unlevel RV can make it difficult to walk, sleep, cook, or shower. Doors may swing open or closed on their own, cabinets may not latch correctly, and appliances may not operate as intended. In some RVs, especially those with absorption refrigerators, being too far out of level can also affect appliance performance.
Before you connect everything and settle in, take a few minutes to check your level from side to side and front to back.
Tips for Leveling Your RV
Use leveling blocks, ramps, or your RV’s built-in leveling system if equipped. Avoid relying only on how the RV “feels.” A small bubble level or built-in leveling indicator can help you get a more accurate reading.
For towable RVs, it is usually best to level side to side first before unhitching. Once the trailer is positioned correctly, you can then level front to back using the tongue jack or landing gear. For motorhomes, position the RV where you want it, then use your leveling system or blocks as needed.
Take your time with this step. It is much easier to adjust your position before slides are out, hoses are connected, and outdoor gear is unpacked.
2. Forgetting to Use a Surge Protector
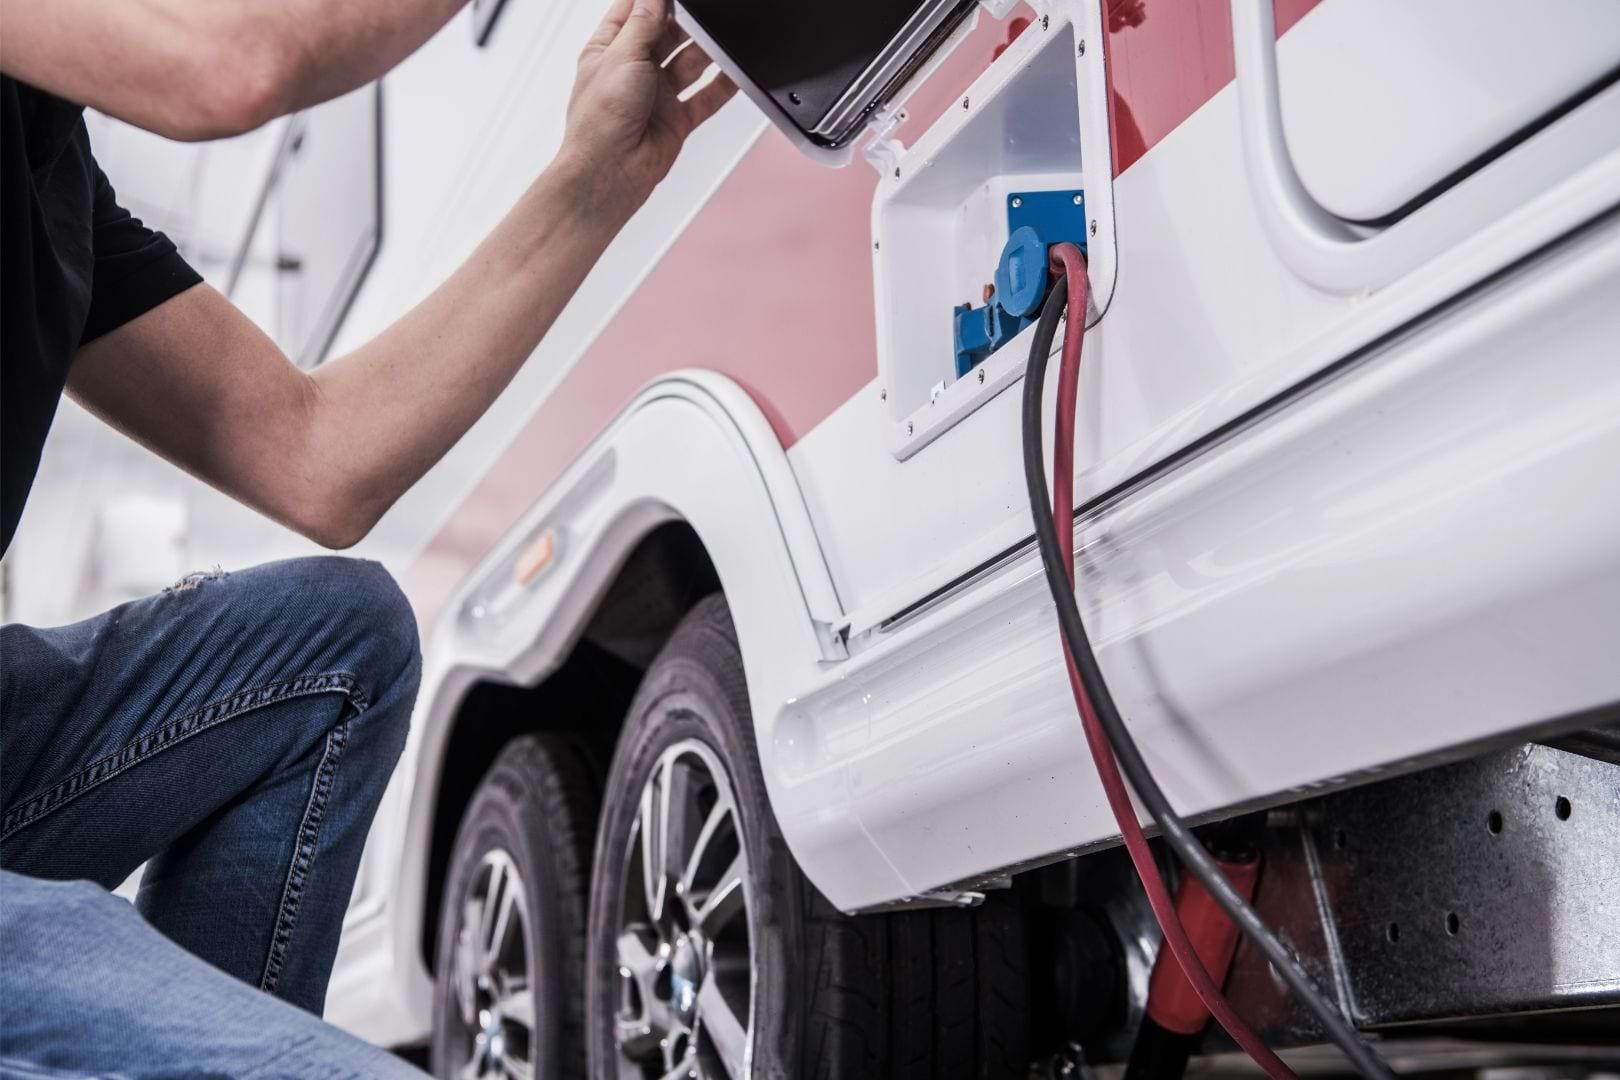
Power issues can happen at any RV park, campground, or private hookup. Low voltage, high voltage, open grounds, reverse polarity, and power surges can damage sensitive electronics and RV systems. That is why a quality RV surge protector or electrical management system is one of the smartest accessories you can own.
Many RVs today are loaded with electronics, including air conditioners, refrigerators, microwaves, televisions, control boards, converters, inverters, and smart devices. Plugging directly into a pedestal without protection can leave those systems vulnerable.
Why a Surge Protector Matters
A surge protector acts as a protective barrier between your RV and the electrical pedestal. Basic surge protectors help guard against power spikes, while more advanced electrical management systems can detect wiring problems and unsafe voltage levels before allowing power into your RV.
This is especially important during hot Texas weather, when air conditioners are working hard and electrical demand can be high. Protecting your RV’s electrical system is much cheaper than replacing damaged components.
Best Practice Before Plugging In
Before connecting your RV, turn off the breaker at the pedestal. Plug your surge protector into the pedestal first, then connect your RV power cord. Once everything is securely connected, turn the breaker back on.
When disconnecting, reverse the process: turn the breaker off first, then unplug your equipment. This simple habit helps reduce arcing and protects both your RV and the pedestal.
3. Skipping the Water Pressure Regulator
Another common RV setup mistake is connecting directly to the water spigot without a water pressure regulator. RV plumbing systems are not designed to handle the same pressure as many residential or commercial water systems. Excessive pressure can lead to leaks, loose fittings, damaged hoses, or plumbing issues inside the RV.
A water pressure regulator helps keep incoming water pressure at a safer level for your RV.
Why Water Pressure Can Be a Problem
Water pressure can vary from one location to another. Even if the pressure seems fine at one RV site, that does not mean it will be the same at the next. Without a regulator, you may not realize the pressure is too high until a fitting leaks or a line is stressed.
A regulator is inexpensive, easy to use, and can help prevent a lot of trouble.
How to Connect It Correctly
Attach the water pressure regulator directly to the campground water spigot first. Then connect your drinking water hose to the regulator. This helps protect not only your RV plumbing, but also your hose and connections.
For best results, use a drinking-water-safe hose and check all connections for leaks once the water is turned on. It is also a good idea to keep a spare hose washer on hand, since worn washers are a common cause of dripping connections.
4. Not Supporting the Sewer Hose
Your sewer hose needs proper support to drain correctly. One mistake many RVers make is laying the hose flat on the ground without a steady slope toward the sewer connection. This can cause waste or gray water to sit in low spots instead of flowing smoothly.
A sewer hose support helps create a consistent downhill path from your RV to the sewer inlet.
Why Sewer Hose Support Is Important
Without support, the sewer hose can sag, kink, or collect waste in low areas. That can lead to odors, messy cleanups, clogs, or a much less pleasant dumping experience.
Using a support also helps keep the hose off the ground, making your setup neater and reducing wear on the hose.
Good Sewer Setup Habits
Make sure your sewer hose is securely connected at both ends. Use the proper fitting at the sewer inlet so the connection stays stable. Arrange the hose with a gentle downward slope and avoid sharp bends whenever possible.
Keep your black tank valve closed until it is time to dump. Leaving it open all the time can allow liquids to drain away while solids remain behind, which may lead to clogs or buildup. Many RVers keep the gray tank closed as well until they are ready to flush the sewer hose after dumping the black tank.
Always wear gloves when handling sewer equipment, and store sewer hoses separately from freshwater hoses and accessories.
5. Not Leaving Enough Clearance for Slides, Awnings, and Vehicles
Before fully setting up, take a careful look around your site. One of the easiest mistakes to make is parking without leaving enough clearance for slide-outs, awnings, storage bays, tow vehicles, picnic tables, trees, utility posts, or neighboring sites.
Once you are tired from travel, it is tempting to park quickly and start unloading. But a few minutes of checking clearance can prevent damage and frustration.
Check Before Extending Slides
Before extending any slide-outs, walk around the RV and look at both sides. Make sure there are no trees, posts, utility pedestals, picnic tables, or other obstacles in the way. Also check overhead clearance, especially near branches or rooflines.
Inside the RV, make sure cabinet doors, furniture, rugs, or personal items are not blocking the slide path. Slide-outs are powerful, and even a small obstruction can cause damage.
Be Careful With Awnings
Awnings are great for shade, especially during warm Texas days, but they also need room. Before extending your awning, check for trees, nearby RVs, vehicles, and wind conditions.
If strong winds or storms are expected, retract the awning. Leaving an awning out during bad weather can lead to expensive damage. Even a sudden gust can cause problems.
Think About Your Tow Vehicle
Do not forget to leave enough room for your truck, tow vehicle, or extra car. Make sure you can safely enter and exit the site without blocking roads, neighboring spaces, or utility access.
If you are staying for more than a night or two, consider how you will use the space during your stay. You may want room for outdoor chairs, a grill, a pet area, or storage compartments.
6. Connecting Utilities in the Wrong Order
A smooth RV setup usually follows a consistent order. When you connect things randomly, it is easier to forget steps or create problems.
A simple setup routine can help you stay organized.
A Smart RV Setup Order
Start by positioning the RV in the site and checking your clearance. Next, level the RV. Once level, stabilize it if needed. Then connect your electrical power using a surge protector. After that, connect water using a pressure regulator. Finally, connect your sewer hose with proper support.
This order may vary depending on your RV, but having a repeatable checklist helps reduce mistakes.
For towable RVs, remember that leveling and unhitching should be done carefully before extending slides or stabilizers. Stabilizer jacks are designed to reduce movement, not lift or level the RV.
7. Rushing the Setup Process
Many RV setup mistakes happen because people rush. After a long drive, everyone wants to relax, grab food, walk the dog, or turn on the air conditioning. That is understandable, but rushing through setup can cause problems.
A forgotten surge protector, an unregulated water connection, an unsupported sewer hose, or a slide-out extended into an obstacle can quickly turn a relaxing trip into a stressful one.
Build a Simple Checklist
A written checklist is one of the easiest ways to avoid mistakes. It does not need to be complicated. Keep it in your phone, RV storage compartment, or tow vehicle.
Your checklist might include:
- Check site position and clearance
- Level RV side to side and front to back
- Chock wheels if needed
- Disconnect tow vehicle if applicable
- Deploy stabilizers or leveling system
- Connect surge protector
- Connect power cord
- Connect water pressure regulator
- Connect freshwater hose
- Check for leaks
- Connect sewer hose
- Set sewer hose support
- Extend slides only after checking clearance
- Set up awning only when conditions are safe
The more often you follow the same process, the more natural it becomes.
8. Forgetting About the Departure Setup
Avoiding RV setup mistakes is not just about arrival. It is also about getting ready to leave safely. Many RVers have damaged equipment by driving away with something still connected or extended.
Before leaving your site, do a full walkaround.
Departure Mistakes to Avoid
Make sure your water hose, sewer hose, and power cord are disconnected and stored. Confirm that the pedestal breaker is turned off before unplugging. Retract all slides, awnings, steps, antennas, and leveling equipment. Check that storage compartments are latched and that nothing is left behind at the site.
Look above, below, and around the RV. Check tire condition, hitch connections, safety chains, lights, and mirrors before pulling out.
A final walkaround only takes a few minutes, but it can prevent costly mistakes.
9. Not Asking for Help When You Need It
Every RV owner was new once. If you are unsure about your setup, it is better to ask a question than guess. RV systems can vary by model, age, and manufacturer, so what works for one rig may not apply exactly to another.
Experienced RVers are often happy to share advice, and resort staff may be able to help point you in the right direction for general site-related questions.
At Summer Breeze USA RV Resort, we want guests to feel comfortable and confident during their stay. Whether you are visiting the Katy, Texas area for a short trip, an extended stay, or a longer seasonal visit, taking the time to set up correctly helps make the experience much more enjoyable.
Essential RV Setup Items to Keep On Hand
Having the right gear makes setup easier and helps prevent common problems. Every RV owner should consider keeping these basics available:
- Leveling blocks or ramps
- Wheel chocks
- RV surge protector or electrical management system
- Drinking-water-safe hose
- Water pressure regulator
- Sewer hose
- Sewer hose support
- Sewer hose fittings
- Disposable gloves
- Flashlight or headlamp
- Spare hose washers
- Basic tool kit
You do not need every RV accessory on the market, but these essentials can make a big difference.
Final Thoughts: A Better Setup Means a Better Stay
RV setup does not have to be complicated, but it does need to be done carefully. The most common mistakes, such as failing to level properly, skipping the surge protector, forgetting the water pressure regulator, not supporting the sewer hose, or overlooking clearance, are all preventable.
The key is to slow down, follow a consistent routine, and check your surroundings before connecting utilities or extending slides and awnings.
A proper setup protects your RV, keeps your site cleaner, and helps you relax sooner. Whether you are new to RVing or have years of experience, good setup habits make every trip smoother.
If you are planning a visit to the Katy or Houston area, Summer Breeze USA RV Resort offers a comfortable place to settle in, unwind, and enjoy your stay. With the right setup routine, you can spend less time worrying about your RV and more time enjoying the road.